Short 4:59 lesson — quick, focused win for vector animation
100% no-code — uses native Stroke effect in Framer's Effects panel
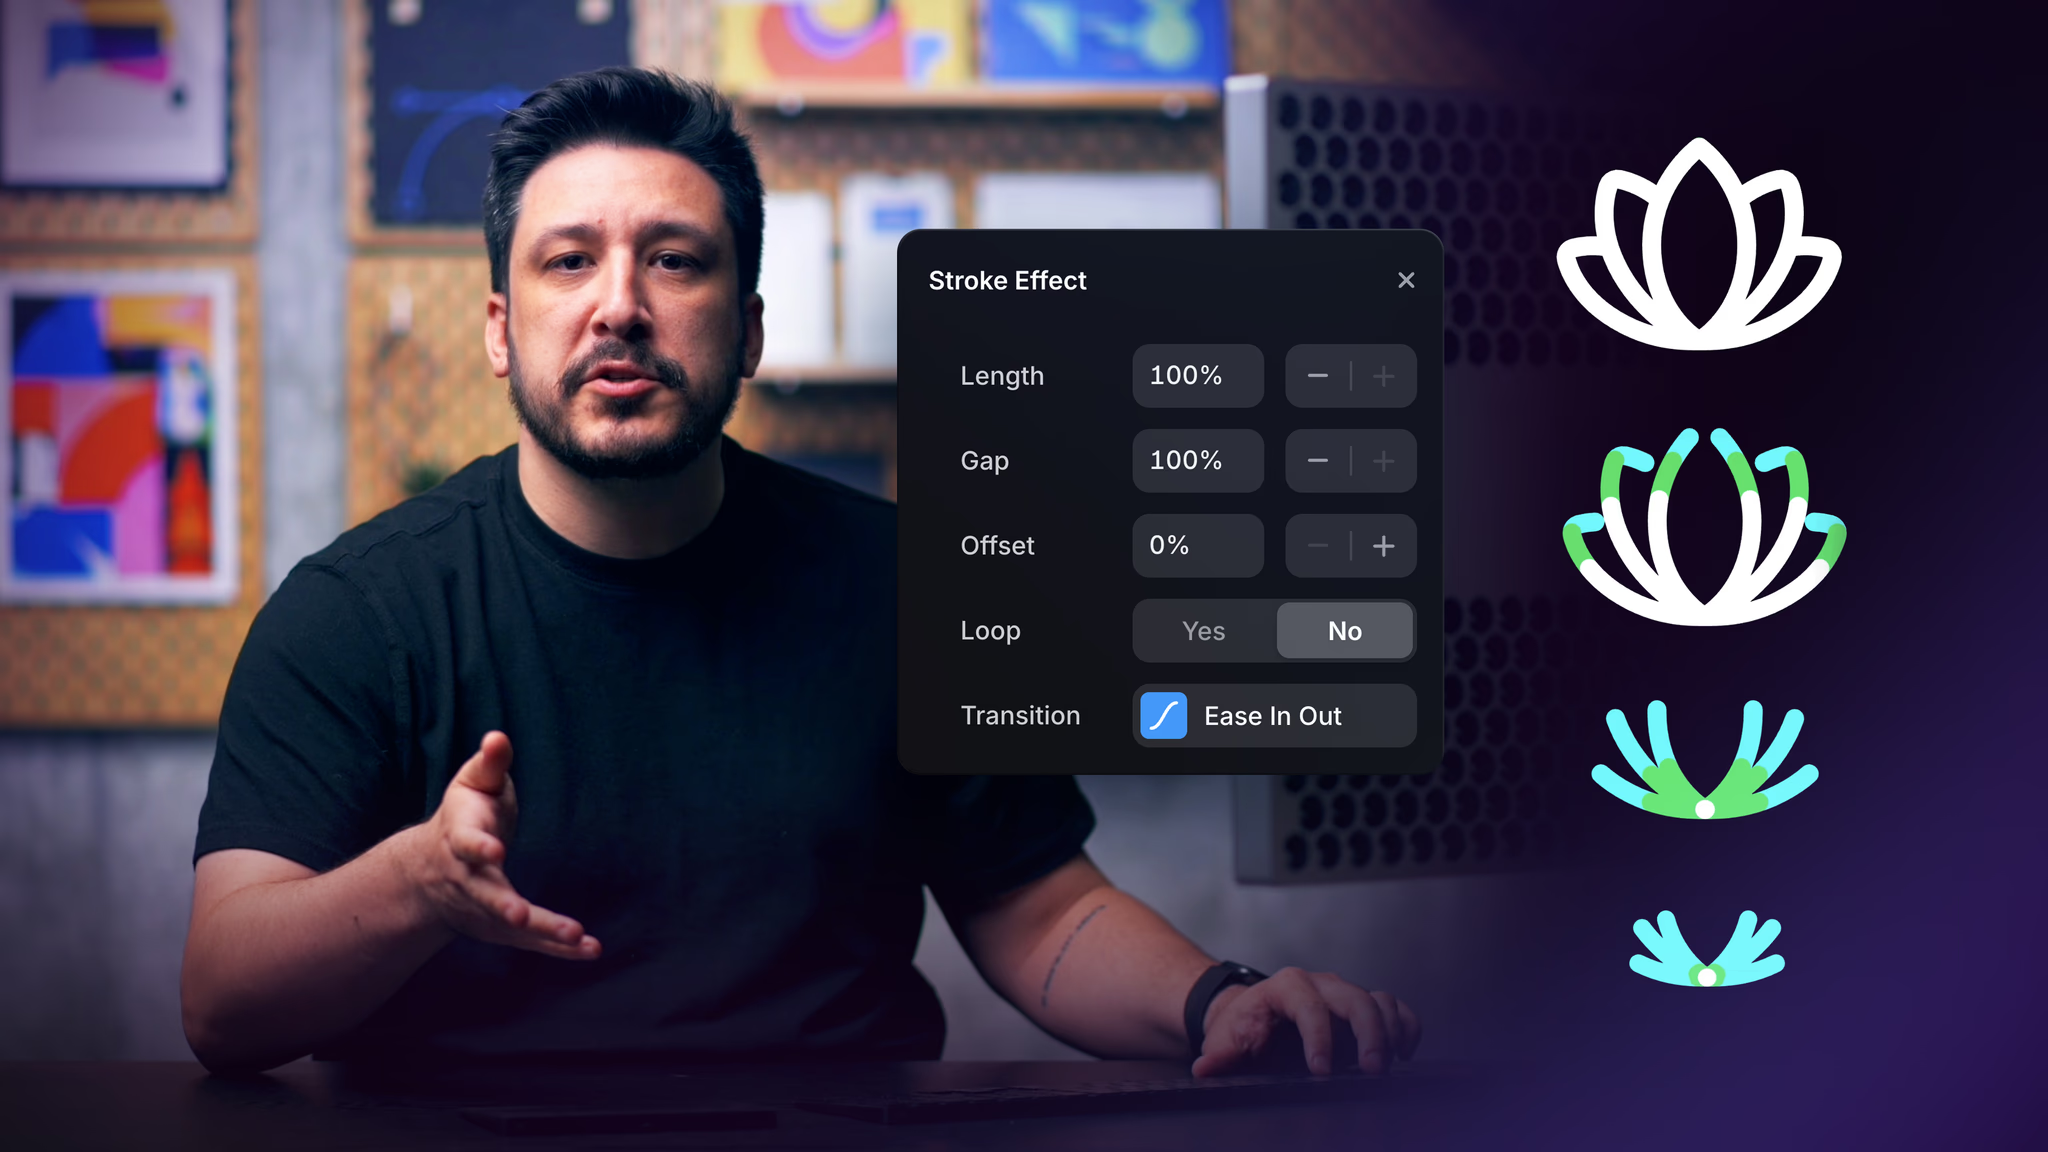
Vector-specific: built for paths/shapes in Framer's Vectors system
Core settings: Length, Gap, Offset — enable drawing, erasing, dashing, direction control
Ideal for icons/logos/illustrations/loaders — creates hand-drawn, cinematic reveals
Part of "Mastering Vectors in Framer" course (Lesson 5, following Drawing, Sets, Variables)
Encourages immediate experimentation for micro-interactions and UI polish
#What is This Video Course?
"Animating Vectors" is a focused, intermediate-level video lesson (approximately 4 minutes and 59 seconds long) within Framer Academy's "Mastering Vectors in Framer" framer resource, published around January 28, 2026. Created by the Framer team, this short video dives specifically into animating vector paths and shapes using Framer's built-in Stroke effect — a vector-specific animation tool designed to create clean, controlled, hand-drawn-style path animations (like drawing icons, logos, or illustrations on load or scroll). The format features live screen recording in the Framer editor, clear narration, real-time demos of settings adjustments, and immediate previews of the animation results. It builds directly on prior lessons in the Vectors course (Drawing with Vectors, Creating Vector Sets, Customizing with Variables) and includes practical examples (e.g., animating multiple paths, reversing draw direction). While no explicit duplicatable project is highlighted for this single lesson, the full course context suggests access to related examples or starter files. The core focus: make vector work feel polished and alive with minimal effort using the Stroke effect for icons, loaders, micro-interactions, and more.
#What You’ll Learn ⚡
How the Stroke effect works specifically for Vectors in Framer — what it does, where to find it in the properties panel, and why it's ideal for path animations
Applying the Stroke effect to vector layers or sets to create drawing/hand-drawn reveal animations
Key settings adjustments: Length (controls how much of the path is visible), Gap (spacing between dashes), Offset (shifts the start point), and animation triggers (e.g., on appear, scroll, or variants)
Animating multiple paths at once within a vector set for coordinated effects (e.g., sequential icon drawing)
Reversing the animation direction (e.g., using Offset to make it "erase" or draw backwards)
Quick tips for clean results: previewing with Command+P, combining with easing/duration, and avoiding common pitfalls for smooth motion
Real-world applications: bringing icons, logos, illustrations, loaders, or dividers to life with subtle, thoughtful animation
#Who Is This For?
Intermediate Framer users who have completed earlier Vectors lessons (drawing, vector sets, variables) and want to add motion to their vector work
Designers working with icons, logos, illustrations, loaders, micro-interactions, or custom dividers who need polished path animations
Anyone using Framer's updated Vectors feature (introduced in recent updates) and looking for the best way to animate them without code
Visual learners who prefer short, focused video demos showing live settings tweaks and instant previews
Creators building portfolios, UI kits, loading states, or interactive elements needing engaging, hand-drawn-style reveals
Framer Academy students progressing through the "Mastering Vectors in Framer" course series
#Course Structure Breakdown
Intro & Context — Brief recap of prior lessons (creating paths/shapes/vector sets); explains why the Stroke effect is the go-to for vector-specific animations and what it achieves (clean, controlled drawing motion).
Finding & Applying the Stroke Effect — Live demo: select a vector layer or set → go to Effects section in properties panel → add Stroke effect → see immediate default animation preview.
Key Settings Deep Dive — Real-time adjustments:
Length & Gap for dash control
Offset for start point and direction (including reverse draw)
Animation triggers (appear, scroll, variants)
Duration, easing, delay for polish
Animating Multiple Paths — Example of coordinating animation across several paths in a set (e.g., icon drawing sequence).
Quick Tips & Best Practices — Preview with Command+P, combine with other effects/variants, keep motion subtle for UX.
Wrap-up — Recap of Stroke effect power; encouragement to experiment; reference to full Mastering Vectors course.
Frequently Asked Questions
Is this a standalone lesson or part of a series?
It's Lesson 5 in the "Mastering Vectors in Framer" course — builds on prior lessons (Drawing, Vector Sets, Variables).
Do I need prior knowledge?
Yes — intermediate; assumes familiarity with creating/organizing vectors in Framer (from earlier course lessons).
Is there a duplicatable project?
Not explicitly for this single lesson, but the full course likely includes examples; check the Academy dashboard or related resources.
Animating Vectors
Stroke effect to animate vector paths with drawing/erase reveals
Resource Types :


Have a product?
Submit your Framer product to AllFramer, get featured, and drive genuine traffic while showcasing your work to the world. Turn your creativity into revenue and begin selling today! 🚀
Submit Resource